News Bulletin Pro is a clean, creative, powerful, flexible, highly customizable, and Gutenberg-ready premium WordPress theme. It is highly responsive and ensures to make your website stand out from the crowd. News Bulletin is a multipurpose theme suitable for any type of WordPress sites such as business, law firms, personal blog, portfolio, startups, agencies, travel, education, fitness, medical, sports, fashion, shop, WooCommerce stores, magazines, lifestyle, finance, accounting, consulting, and preferably ideal for any type of sites. News Bulletin is highly customizable with powerful theme options including multiple Header and Footer layouts. Compatibility for WordPress Classic editor, WooCommerce and Gutenburg makes easier for users. Want a theme to play your site in a myriad of roles your search ends here.
Theme Installation
Via WordPress
Log in to the WordPress Administration Panels.
Go to the Appearance panel, then Themes.
Click Add New.
Upload the Zip file of the theme, news-bulletin-pro.zip
After installing the theme Click Activate button.
Via FTP
Use your FTP software to browse to the wp-content/themes folder.
Extract news-bulletin-pro.zip and upload the folder.
Once it’s uploaded, go to your WordPress Admin, browse to Appearance > Themes.
To create a post on your site, it’s easy. Follow the below-listed methods.
Go to > Administration Panels
Go to > Posts and Click on Add New
Give the title of the post and add the content
Set the featured image for the post from the right corner.
Set that post on the Category.
Click on Publish Button.
Add more posts like the above methods.
Pages
To create a page on your site, it’s easy. Follow the below-listed methods.
Go to > Administration Panels
Go to Page and Click on Add New
Give the title of the page and add the content
Set the featured image for the post from the right corner.
Click on Publish Button.
Add more pages like the above methods.
Categories
To create categories, follow the below steps.
Go to > Administration Panels
Go to Posts > Categories
Give the title of the category
Click on Save
The added category will appear on the Add Post Page.
How to set up Homepage
To setup Homepage Settings
Go to Customize > Homepage Settings and check your latest posts.
Click on Publish.
How to setup id section
Go to Homepage Widget Area and give the id of the section
Go to Menu> Custom Link>and write id with a # sign
Go to URL and write the name of the menu you want to appear
Finally, click Add to the Menu option and you are done
Site Title, Tagline & Logo
Go to Appearance > Customize > Site Identity
Click on Select Logo
Select the logo.
After the logo is selected, your site title and tagline will hide on the front end.
If the preview is fine, click on Save & Publish to save the changes.
Homepage General Settings
Homepage General Settings offers a wide range of choices such as “Preloader Option”, “Site Layout”, “Theme Mode”, “Breaking News Options”, “Trending News Options”, “Header Social Sharing”, ” Popular Tags Options”, “Homepage Slider Section”, “Header Layout Options”, “Footer Option”, “Category Color”, “Date Format Option”, “Sticky Menu Option”, “Scroll Option”, and “Meta Option On Front”.
Preloader Options
Go to Customize > Homepage General Settings > Preloader Options
Tick on “Enable Preloader” to enable this option on your homepage.
Then click on publish.
Site Layout
Go to Customize > Homepage General Settings > Site Layout
You can choose the layout for your website from the choices of “Box Layout” and “Full Layout”.
Then click on publish.
Theme Mode
Go to Customize > Homepage General Settings > Theme Mode
You can change the mode of your theme. If you want a light theme, select “Light Mode” and if you want a dark theme, select “Dark Mode”.
Then click on publish.
When “Light Mode” is selected:
When “Dark Theme” is selected:
Breaking News Options
Go to Customize > Homepage General Settings > Breaking News Options
Select display position of the Breaking News section from “Top Header” and “Under Menu Bar”.
Choose “Show” if you want to display this section on your website.
Choose “Hide” otherwise.
Give a Title.
Select the category you want to display from.
Select the number of posts you want to display.
Then click on publish.
Header Social Sharing
Go to Customize > Homepage General Settings > Header Social Sharing
Select “Show” to display all your social media icons on header section.
Give url links of your social sites and then publish.
Popular Tag Options
Go to Customize > Homepage General Settings > Popular Tag Options
Click on the “Show” button to display popular tags on your homepage.
Give a title.
Select the number of tags you want to display.
Then click on “Publish”.
Trending News Options
Go to Customize > Homepage General Settings > Trending News Options
Click on the “Show” button to display sliders on your homepage. Click on “Hide” otherwise.
You can choose where you want to display the Trending News section from three alternatives: “Top Header”, “Under Menu Bar”, and “Under Banner Section”.
Give a Title.
Select the category you want to display on your slider.
Select the number of posts you want to display in a slider.
Then click on publish.
Homepage Slider Section
Go to Customize > Homepage General Settings > Homepage Slider Section
Click on the “Show” button to display sliders on your homepage.
Select the category you want to display on your slider.
Select the number of posts you want to display in a slider.
Then click on publish.
Header Layout Options
Go to Customize > Homepage General Settings > Header Layout Options
Select Layout Option according to your preference.
Then click on publish.
Footer Option
Go to Customize > Homepage General Settings > Footer Option
Write the copyright text of your company.
Give URL link as well.
Then publish.
Category Color
Go to Customize > Homepage General Settings > Category Color
Select different colors for the different categories that you have created.
Then click on publish.
Date Format Option
Go to Customize > Homepage General Settings > Date Format Option
You can select either the Theme Default Date option or the WordPress Default Date option.
When you are done, click on publish.
Sticky Menu Option
Go to Customize > Homepage General Settings > Sticky Menu Option
Tick on “Enable Sticky Menu” to enable a sticky menu on your homepage.
When you are done, click on publish.
Scroll Option
Go to Customize > Homepage General Settings > Scroll Option
Tick on “Enable Bottom To Top Scroll Arrow” to enable the scroll option.
When you are done, click on publish.
Meta Option On Front
Go to Customize > Homepage General Settings > Meta Option On Front
Select the meta option from the dropdown menu which consists of “Display Author and Date”, “Display Date Only”, or “None”.
Then click on publish.
Theme Option
There are several options inside this panel such as “Disable Menu Home Button”, “Default Sidebar Layout Option”, “Feature Image Option For Single Post/Page”, ” Front Page Options”, “Breadcrumb Options”, “Hide Latest Blog Options”, “Blog/Archive Layout Option”, “Single Post Option”, “Blog and Post Meta Option”, “Search Text Option”, and “Sticky Sidebar”.
Disable Menu Home Button
Go to > Customize > Theme Option > Disable Menu Home Button
If you want Home Icon On Menu, select “Enable”, otherwise select “Disable”.
Then click on publish.
Default Sidebar Layout Option
Go to > Customize > Theme Option > Default Sidebar Layout Option
You can choose the Default Sidebar Layout from the dropdown menu as shown below.
Then click on publish.
Feature Image Option For Single Post/Page
Go to > Customize > Theme Option > Feature Image Option For Single Post/Page
You can either show or hide feature images for a single page/post.
Then click on publish.
Front Page Options
Go to Customize > Theme Option > Front Page Options
You can show or hide blog posts or a static page on FrontPage.
Then publish
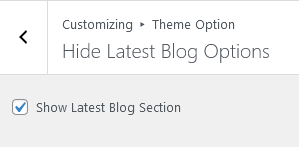
Hide Latest Blog Options
Go to Customize > Theme Option > Hide Latest Blog Options
You can show or hide the latest blog posts.
Then publish.
Blog/Archive Layout Option
Go to Customize > Theme Option > Blog/Archive Layout Option
You can choose to show descriptions from excerpts or content.
You can give the blog page title.
You can define the length of words in the description.
You can show descriptions from either content or excerpt.
You can choose the layout for your blog from two layout options: Layout one and Layout two.
You can also add title to the Read More Text Section.
Then click on publish.
BreadCrumb Options
When Enabled:
When Disabled:
Single Post Option
Go to Customize > Theme Option > Single Post Option
You can choose to show or hide related posts in a single post. descriptions from excerpts or content.
You can give a title to display Related Posts.
You can choose the number of posts you want to present in the related posts section.
You can define the number of words in the contents-related posts section.
You can either show or hide categories/date and author info.
You can also add a title to the Read More Text Section.
Then click on publish.
Blog and Post Meta Option
Go to Customize > Theme Option > Blog and Post Meta Option
You can choose to either show or hide – Author and Date, Cats, and Comments.
Then click on publish.
Search Text Option
Go to Customize > Theme Option > Search Text Option
You can add text to Search Placeholder and Search Button Text.
Then click on publish.
Sticky Sidebar
Go to Customize > Theme Option > Blog and Post Meta Option
Tick “Enable Sticky Sidebar” to enable a sticky sidebar on your theme. Leave it unticked, otherwise.
Then click on publish.
Typography Option
Go to Customize > Typography Option
You can choose the fonts and their size for different sections of your website.
Then click on publish.
Colors
You have a wide range of color options such as “Header Text Color”, “Background Color”, “Menu Background Color”, “Menu Text Color”, “Primary Color”, “Breaking News Background Color”, Top Footer Background Color”, and “Bottom Footer Background Color”.
Go to Customize > Colors
Select your preferred color.
Click on Save & Publish to save the changes.
Header Image
You can add a header image and then publish.
Background Image
You can set a background image and
Then click on publish.
Gutentor Options
Go to Customize > Gutentor Options
It is further categorized as General Options, Post Format Icon, and Category Color.
General Options
Go to Customize > Gutentor Options > General Options
Category Color
Go to Customize > Gutentor Options > Category Color
You can set different colors for a different category.
Post Format Icon
Go to Customize > Gutentor Options > Post Format Icon
You can choose icons according to the format of your post.
Menus
This theme comes with two menu locations. Primary Menu, and Top Menu.
Primary Menu
This menu will appear on the Main menu for the site below the logo section.
Create a menu and add the items on the menu.
Set the menu on the Primary Menu.
Save the Menu
Top Menu
Top Menu will appear on Top of the Header (As in Demo)
Create a menu and add the items on the menu.
Set the menu on the Top Header Menu.
Save the Menu.
Widgets
News Bulletin Pro comes with a wide range of widgets such as “2 Column Widget”, “3 Column Widget”, “Advertisement Widgets”, “Author Widget”, “Homepage Layout”, “Layout Slider Widget”, “Multi-Tabbed Widget”, “Social Widgets, “Popular Sidebar Widgets”, and “Recent Posts Widget”.
AT: Advertisement Widget
For setting up widgets
Go to > Appearance and click Widgets
Drag and Drop AT: Advertisement Widget and take them inside the Advertisement Area and Sidebar.
Give a title and URL to your advertisement.
After you are done, click on Done and then publish.
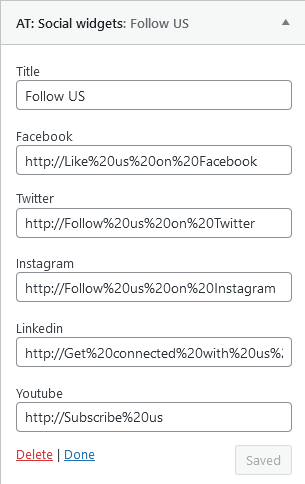
AT: Social Widgets
For setting up widgets
Go to > Appearance and click Widgets
Drag and Drop AT: Social Widgets and take them inside the Sidebar.
Give URL of all your social handles.
After you are done, click on Done and then publish.
AT: Popular Sidebar Widgets
For setting up widgets
Go to > Appearance and click Widgets
Drag and Drop AT: Popular Sidebar Widgets and take them inside the Sidebar.
Give the title and select the category from which you want to display.
After you are done, click on Done and then publish.
AT: Home Page Layout
For setting up widgets
Go to > Appearance and click Widgets
Drag and Drop AT: Home Page Layout and take them inside the Top Homepage Section with No Sidebar.
Give a title, select layout, select category, and define the number of posts you want to display.
After you are done, click on Done and then publish.
AT: 3 Column Widget
For setting up widgets
Go to > Appearance and click Widgets
Drag and Drop AT: 3 Column Widget and take them inside the Homepage Section With No Sidebar.
Select different Categories for three columns.
Choose the number of posts you want to display.
After you are done, click on Done and then publish.
AT: 2 Column Widget
For setting up widgets
Go to > Appearance and click Widgets
Drag and Drop AT: 2 Column Widget and take them inside the Homepage Section With No Sidebar.
Select different Categories for two columns.
Choose the number of posts you want to display.
After you are done, click on Done and then publish.
AT: Layout Slider Widget
For setting up widgets
Go to > Appearance and click Widgets
Drag and Drop AT: Layout Slider Widget and take them inside the Homepage Section.
Give a title.
Select the category from which you want to display posts.
Choose the number of posts you want to display.
After you are done, click on Done and then publish.
AT: Multi-Tabbed Widget
For setting up widgets
Go to > Appearance and click Widgets
Drag and Drop AT: Multi-Tabbed Widget and take them inside the Homepage Section With No Sidebar.
Give a title.
Select the category from which you want to display posts.
Choose the number of posts you want to display.
After you are done, click on Done and then publish.
AT: Recent Posts
For setting up widgets
Go to > Appearance and click Widgets
Drag and Drop AT: Recent Posts and take them inside the Footer Area.
Give a title and select the number of posts to show. Also, check “Display post date” to display the date of the post published.
After you are done, click on Done and then publish.
WooCommerce
Go to Customize > WooCommerce
Set up “Store Notice”, “Product Catalog”, “Product Images”, and “Checkout” options.
After you are done making the chnages, click on publish.
Additional CSS
Go to Customize > Additional CSS
You can add your own CSS to make changes that are not offered by the theme.
Export/Import
Go to Customize > Export/Import
You can import or export the customization settings.